To Illustrate: to clarify, explain or describe, through the use of pictures, diagrams or words, a concept or problem.

The concept is food: an amateur's illustration.

Showing posts with label Bread and Pastries. Show all posts

Saturday, 18 February 2012

Lets go Bananas for Black Banana Bread


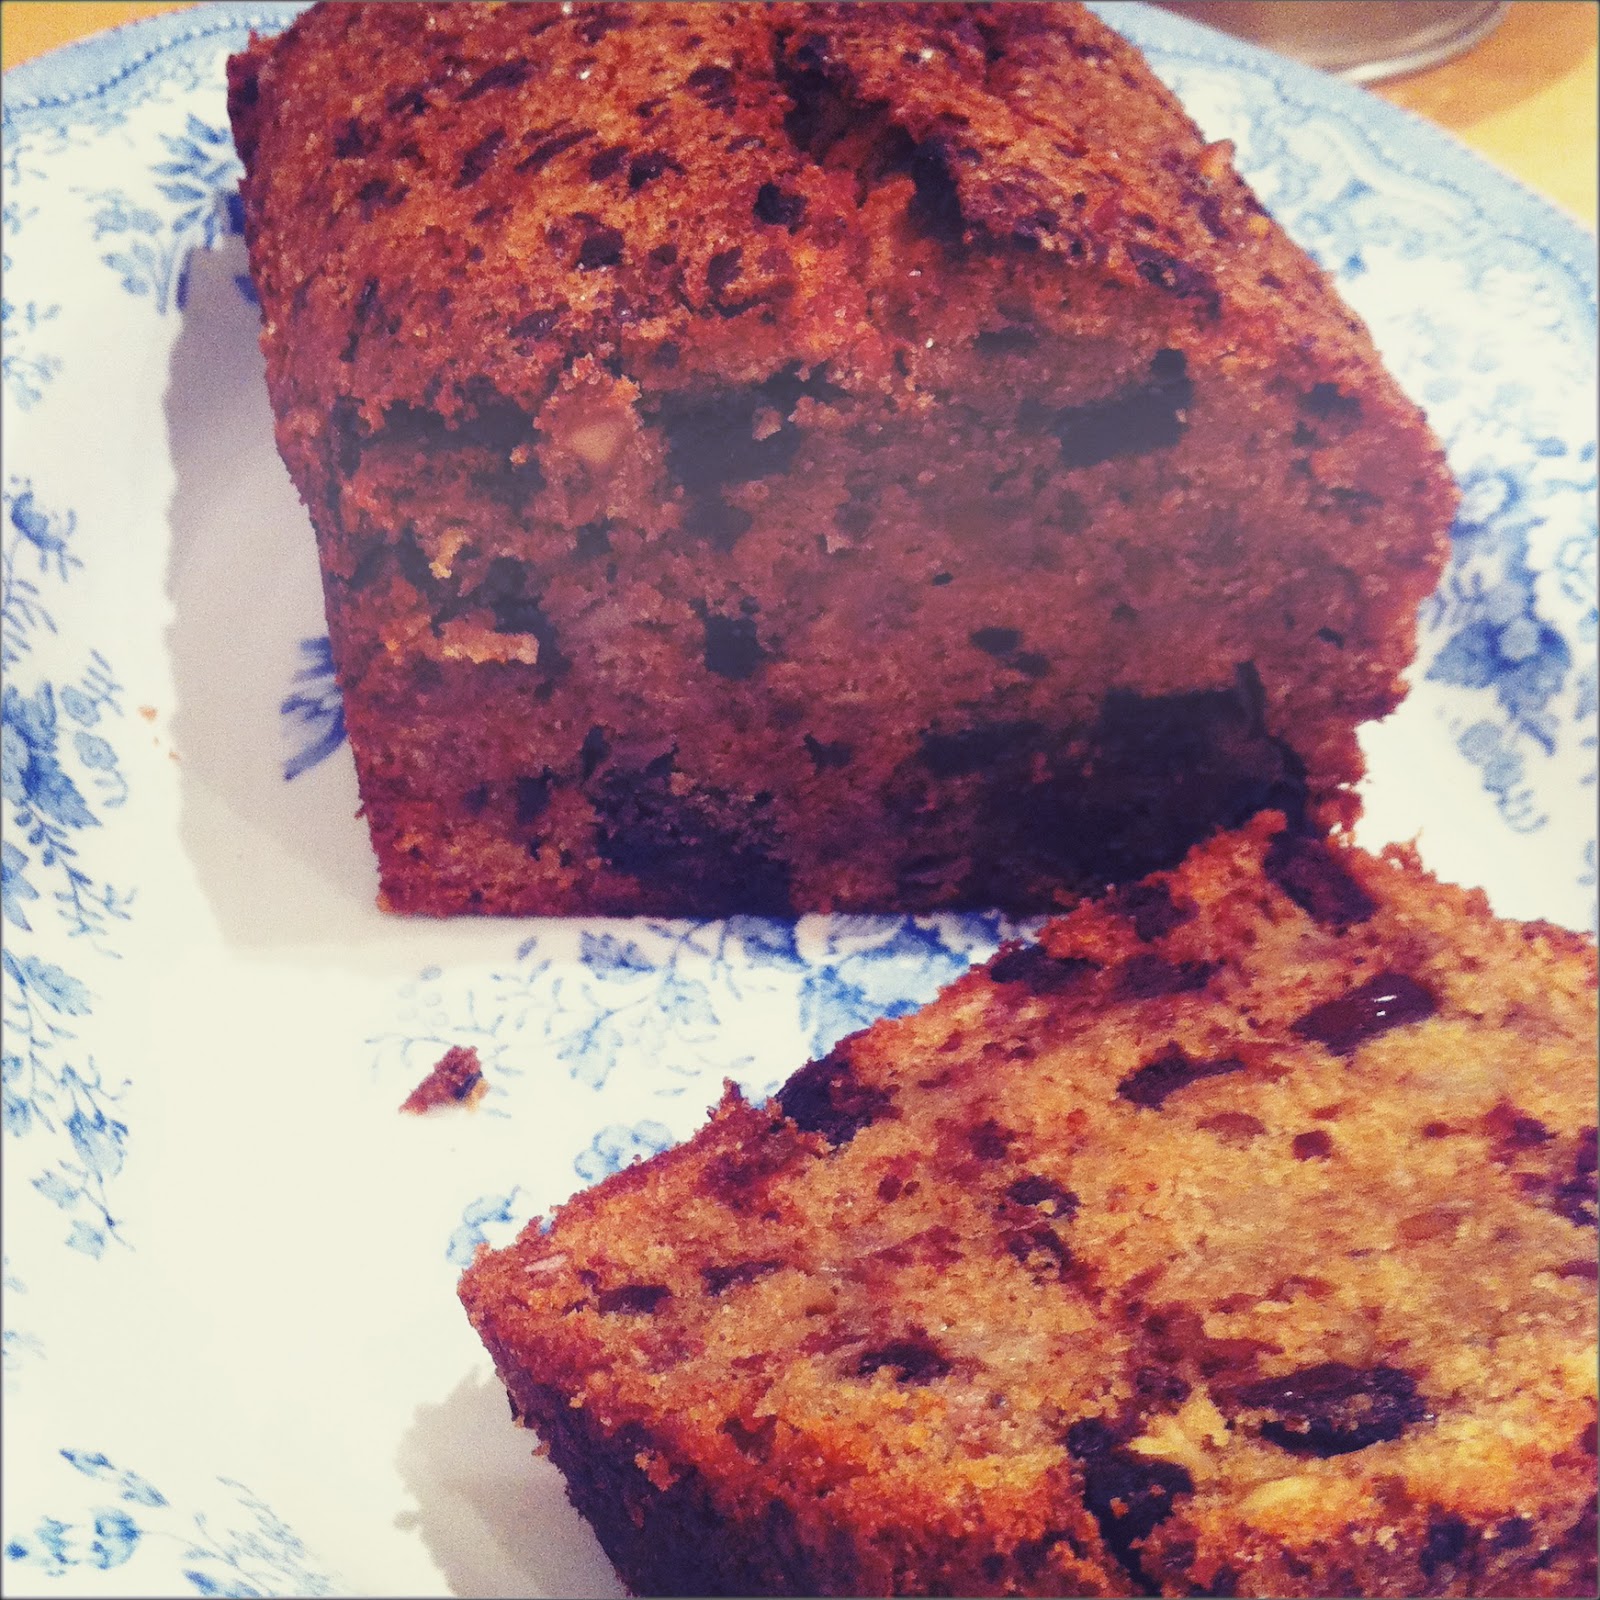
I always find myself saying, when I look down at a pair of brown, extremely ripe and squidgey bananas, 'I really should turn you into banana bread', then after contemplating for a couple of seconds I usually sigh and move on. Then a couple of hours later end up throwing the bananas out. However this time, when I heard myself reciting the same old familiar thought whilst staring at a pair I thought 'No, actually today I am going to do it'. And I have, and the bread is delicious, chocolatey and oh so nutty and well worth doing on a Saturday afternoon. Using a recipe taken from my favourite Nigel Slater, I have transformed these banana's into a glorious loaf.


Ingredients:
  • 175g/6oz unsalted butter softened
  • 175g/6oz sugar (half light muscovado, half golden caster)
  • 75g/2½oz hazelnuts/walnuts
  • 2 free-range eggs
  • 175g/6oz self raising-flour
  • 2 very ripe bananas (about 250g/9oz total weight)
  • drop vanilla extract
  • 175g/6oz good-quality dark (cut into small chucks)

Recipe:

  1. 1. Preheat the oven to 170C/325F/Gas 3. Line the base and sides of a 20cm x 12cm/8in x 5in loaf tin with baking parchment.
  2. 2. Beat the butter and sugars in a bowl until the mixture is light and coffee-coloured (make sure the butter is a room temperature then this stage will be much easier - especially if you don't have a mixer!)
  3. 3. Toast the nuts (Which ever you are using) then remove their skins with a tea towel. Then grind.

  4. 4. Slowly add the eggs to the butter and sugar mixture, then mix in the toasted ground hazelnuts and self-raising flour.
  5. 4. Peel the bananas and chop them the small pieces. Gently fold the vanilla extract, the chopped bananas and the chocolate chips into the cake mixture, turning gently and taking care not to over mix.
  6. 6. Scoop the cake batter into the prepared loaf tin. Dust with a little demerara sugar or chocolate shavings and bake for between 1 hour and 1 hour 10 minutes, covering the cake with foil if the top starts to darken too quickly

    Serve: Once cooled cut off a big slice and devour with a lovely cup of tea or in the morning at breakfast, or as a lunch time snack. Really just have it and eat it anywhere - you will find it almost impossible to have only the smallest slither.


    Serve: Once cooled, cut off a large slice and devour with a cup of tea. Enjoy it as a mid afternoon snack or in the morning at breakfast, or when you have the midnight munchies, or whenever or wherever you like. I guarantee that you will find it almost impossible to have only a tiny slither of this banana bread. 

Sunday, 4 September 2011

Cherry and Ricotta Strudel

Making your own Filo pastry can be fun but for convenience and less effort I suggest buying Filo Pastry sheets. My favourite is the french brand Feuilles De Filo which is really easy to use. You can use which ever cheese you prefer. I tried the recipe out using both cheeses and they both worked just as well as each other - but I would say if I had to have a preference I would use ricotta - as a treat!


Ingredients

Studel
filo pastry (eight sheets)
melted butter
a handful of flaked almonds

Cherry and Cheese Filling

1 x 250g cream cheese 
OR 
1 x 250g Ricotta
55g caster sugar
1 tbs lemon juice
2 tsp lemon rind
250 g pitted cherries (tinned or fresh)

Method

1.Preheat the oven to 180°C, and line a baking tray with grease proof paper/baking parchment.
2.In a large bowl beat together, the cheese, sugar, juice and rind. Once combined, stir in the pitted cherries and leave to one side.
3.Place the first sheet of Filo pastry on a clean surface and brush with melted butter. Place the next sheet of pastry on top and repeat until you have done all eight sheets.
4.Spoon the cream cheese mixture along a long edge, leaving an 8cm border on three sides. Fold in the ends and roll up to enclose the filling. Place on the prepared tray. 
5.Brush some melted butter onto the rolled strudle and sprinkle with almonds.
6.Bake in preheated oven for 30 minutes or until strudel is golden brown and cooked through.
7.Remove from oven and set aside for 30 minutes to cool to room temperature

Monday, 15 November 2010

Homemade Croissants

I have wanted to make croissants for ages, so when I stumbled across  an amazing recipe from:http://squarekitchen.blogspot.com/ . I thought I would give them a go.  

Ingredients
500 grams Flour
10 grams salt
60 grams sugar
30 grams butter
30 grams yeast
2 eggs
200 ml whole milk


250 grams butter (for the second day)


Method
Day One
Prepare the dough. In a large bowl mix the flour, salt, sugar, butter, yeast, eggs and milk. Knead the mixture until a smooth, even dough is formed, making sure that is is not sticky.


Cover the bowl with a towel or plastic film and refrigerate in overnight.

Day two
Place the butter in between two sheets of cling film and flatten using a rolling pin, until it is one centimetre in height and roughly the shape of a rectangle.


Take the dough out of the fridge and on a flat, floured surface roll the dough out until it is double the size of the rolled butter. 

Place the butter in the middle of the flattened dough, and fold the edges of the dough into the middle, covering the butter. Roll the dough into a long rectangle, until it is one centimeter high.


The First Turn
You now need to start turning the dough. In your head, split the dough into three sections, then fold two of the sections into the third. One from the left into the middle, and the other from the right into the middle.


The dough now has 3 layers. Turn the dough 90 degrees and flatten the dough again to a long rectangle until it is once again one centimetre high.


The Second Turn
Fold the dough again from both sides to the middle - this makes 6 layers of butter, flatten. Fold the dough again into the middle - this makes 12 layers of butter. 
Keep turning the dough as many times as you like as the more the turns, the more light and buttery the croissants will be. You have got to keep the dough cold, so after you have turned it, it must go in the fridge for at least 4 hours. I kept my dough in the fridge over night.

Shaping the dough
The next day roll the dough out until it is 5 millimeters thick and rectangular in shape and cut out right angled triangles from the dough. This is your croissant. Now you need to roll the croissants, beginning with the widest side of the triangle, finishing with the peak underneath the rolled croissant. 


Place them on parchment paper on a baking tray and wash with an egg wash (one egg yolk and a splash of milk to give it a glossy shine). 


Bake them in an oven at 180 degrees C for 18-22 minutes until they are golden brown. 


Serve with even more butter and lots of jam. 


The croissants went well. Not as well as I had hoped, as they ended up much smaller and more bread like. I think I turned the dough to many times, or didn't let them rise long enough before I put them in the oven. They tasted like croissants though and were delicious when they came hot out of the oven. I will defiantly make them again. I think it will just take practice.